A. Connect the LAN/Ethernet cable at the back of your DVR.
Note: Make sure that the LAN/Ethernet cable is connected to your router.
B. Setting up the internet configuration in your DVR.
Go to your DVR and do the following:
1. Right click >> Main menu >> Network setup tab
2. Ethernet setup:
IP address: Should match the IP address of your router
Subnet mask: 255.255.255.0 (standard)
Default gateway: IP address of your router (most routers ip address is 192.168.1.1)
DNS server:
Go to windows >> at the search textbox, type in >> cmd
Type in >> ipconfig /all >> search for your DNS server (use the one that is the same as that of your router’s IP address)
Server port: Used to load the video on the web.
HTTP port: Used to access your DVR over the web.
Handset port: Used to access your DVR over the mobile phones.
3. Save
C. Enabling P2P connection.
1. On the Network setup tab >> P2P setup
2. Check the “enable p2p” checkbox
3. Click “Registration” button
4. Wait for the registration until it is connected to the server.
5. Save >> restart the DVR.
Note: If you don’t have an option to enable P2P and you are seeing a device ID and a QR code with the link to www.qmeye.net, kindly disregard the steps above.
D. Enabling DDNS server
1. Right click>> Main Menu >> Network setup >>DDNS setup
2. Go to DDNS server dropdown >> choose soddns.com
3. Default DDNS domain is promted, yet changeable
4. Click Bind/Binding Domain
5. Check if the status of the DDNS is online and Internet IP is displayed.
(this can be seen at the bottom of the window)
E. Accessing your DVR over the web. (Locally) [DDNS]
1. Go to soddns.com
2. Click “LocalLogin”
3. Type in the following credentials;
DomainName/DeviceID: deviceID from P2P setup
Net Port: 5050 (default, Cannot be changed)
DVRUsername: DVR Username
Password: Password.
4. Click >> Login
F. Accessing your DVR over the web. (WAN/Remotely) via soddns.com [DDNS]
1. Go to soddns.com or your device domain address (example.soddns.com)
2. Click “LocalLogin”
3. Type in the following credentials;
DomainName/DeviceID: deviceID from P2P setup
Net Port: 5050 (default, Cannot be changed)
DVRUsername: DVR Username
Password: Password.
4. Click >> Login
G. Accessing your DVR via DVR direct
1. Open a web browser (Chrome/IE [ Recommended: Internet Explorer])
2. Type the IP address of your WAN and the HTTP port of your DVR in this format: 180.168.15.16:81
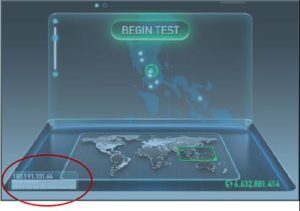
Note: To check your WAN/Public IP address, kindly go to http://www.speedtest.net/ and look
for your WAN IP address.

3. The DVR log in window interface will be displayed. Log in using the following credentials:
IP address: address of the DVR.
Port address: server port.
Username: Your DVR’s username
Password: Your DVR’s password


